3.3 - Making the mod
Creating the mod project
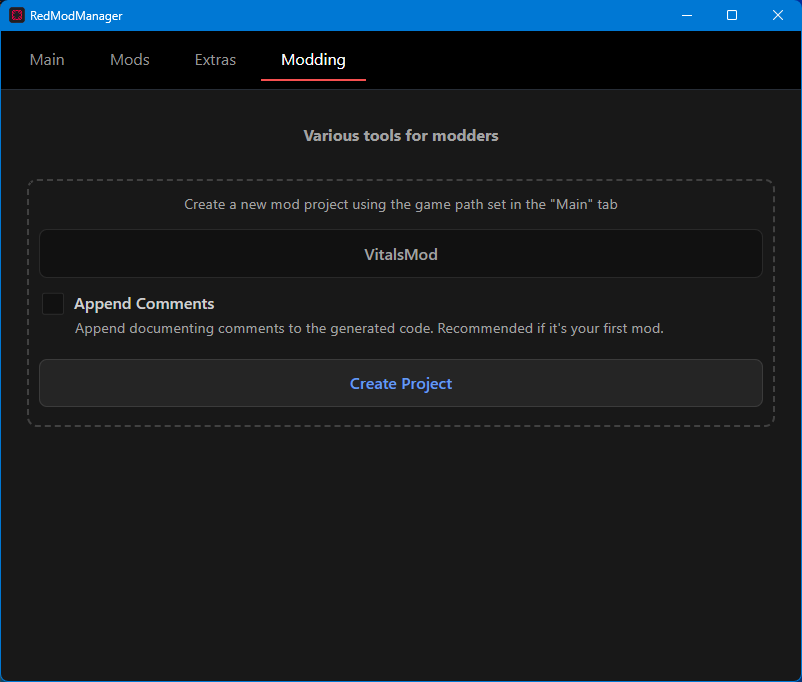
As we did in the first mod project, create a new one following the same guide and open the .sln file which is the Visual Studio mod project.

Preparing the mod
So we created and opened the mod project. We can see we have the same three predefined methods we talked about lessons before.
using SonsSdk;

namespace VitalsMod;

public class VitalsMod : SonsMod
{
    public VitalsMod()
    {

        //HarmonyPatchAll = true;
    }

    protected override void OnInitializeMod()
    {
        Config.Init();
    }

    protected override void OnSdkInitialized()
    {
        VitalsModUi.Create();
    }

    protected override void OnGameStart()
    {
    }
}
While for the first mod we used the OnGameStart method, this time we will use another one which let us execute our code continuosly and not only one time when the game is loaded.
To do that, we need to enable that method by writing it into public ModName()
method like so
public VitalsMod()
{
    OnWorldUpdatedCallback = OnWorldUpdate;
    //HarmonyPatchAll = true;
}
and then define it like so
public VitalsMod()
{
    OnWorldUpdatedCallback = OnWorldUpdate;
    //HarmonyPatchAll = true;
}

// We added this method which is linked to the OnWorldUpdatedCallback above
public static void OnWorldUpdate()
{

}
The OnWorldUpdatedCallback
method
This method gets executed only when you are loaded into a savegame, and it's called as many times as your fps at every second. This means that if you are doing 80fps in game, the code inside the curly braces will get executed 80 times per second. This is needed for something we want to always stay the same while we are playing, like maintaining the health always to 100%, and that's exactly what we are gonna do now.
To do that, as we have seen in UnityExplorer before, we need to get a reference of the LocalPlayer. If you remember for the first mod to use it we needed to reference the game dll which contains informations about the player, and that is Sons.dll. So we have to do the same as before, right clicking on Dependancies in the Solution Explorer and hitting Add Project Reference... then browse to the game folder/_RedLoader/Game and select Sons.dll. If you have any doubt just refer to the first mod guide.
Coding the mod
Now that we have set up our OnWorldUpdate method and added the needed dll reference to access the player (LocalPlayer in code) we can start typing the actual mod code.
Like we did in the first mod, to get a reference to the player we need to write LocalPlayer
inside the method.
Then, using dots, we can chain up to what we want. In this case, we want to get the SetHealth and SetStamina methods, in order
to change the player health and stamina values.
If you remember from the UnityExplorer but also dnSpy study we did before, these 2 methods are into the Vitals entry unlike
the walk and run speed which are into FirstPersonCharacter.
So to get them we will write it like so:
public static void OnWorldUpdate()
{
    LocalPlayer.Vitals.SetHealth(50);
    LocalPlayer.Vitals.SetStamina(10);
}
and we are done! Our mod is ready to be used. As we said before, this is tied to our FPS, so if we are doing 80fps in game, our health will be set to 50 eighteen times per second. Now build it like we did in the first mod using Build, then Build Solution in the upper bar of Visual Studio. Run the game and while you are playing you will notice your stamina will always be at 10 and your health at 50 (but you will still probably die if something does more than 50 damage to you).